Lamborghini Jalpa
Suspension Struts
![]()
|
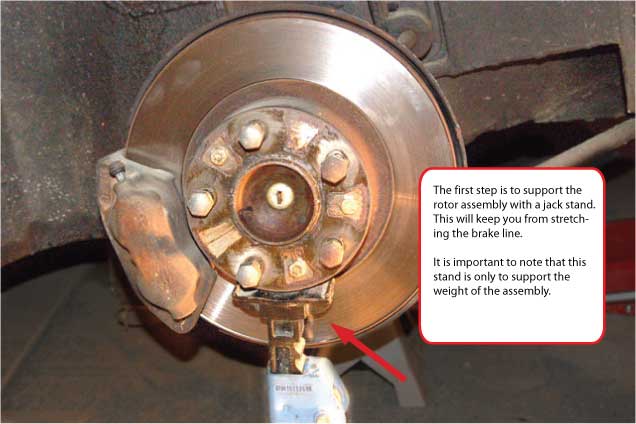
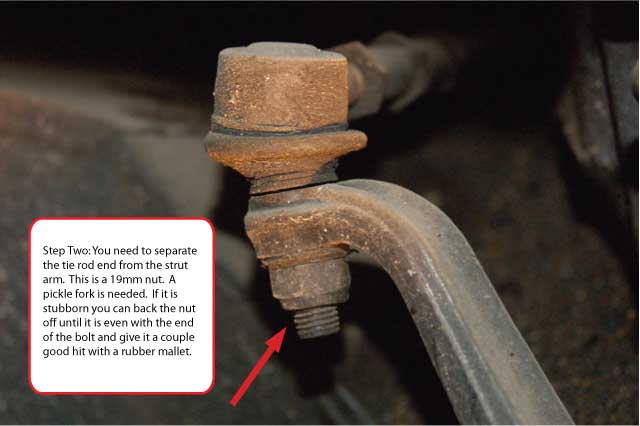
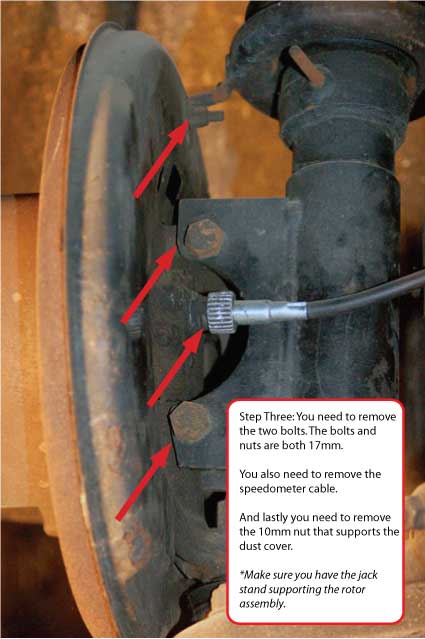
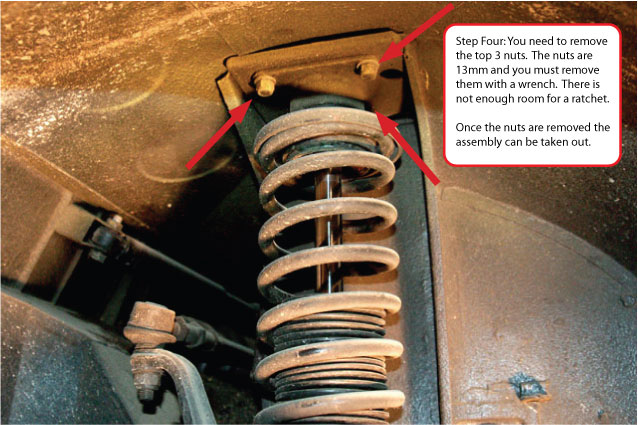
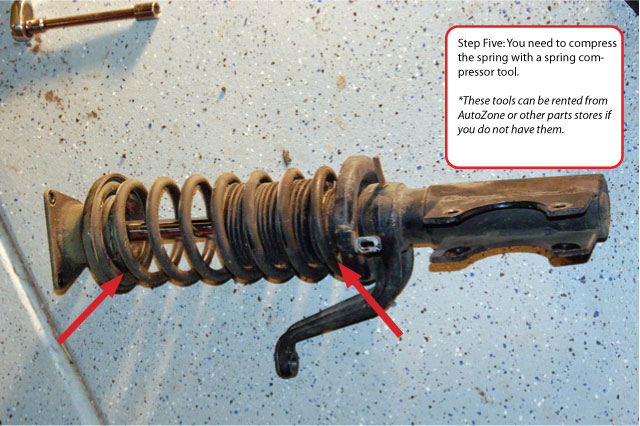
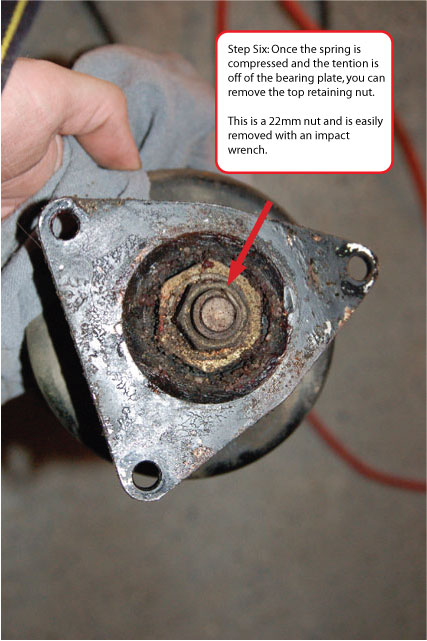
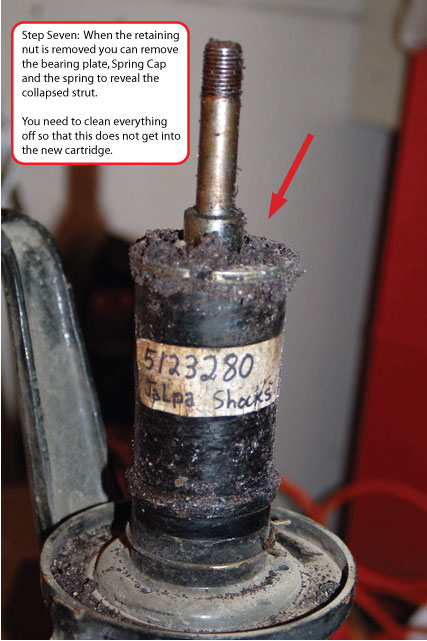
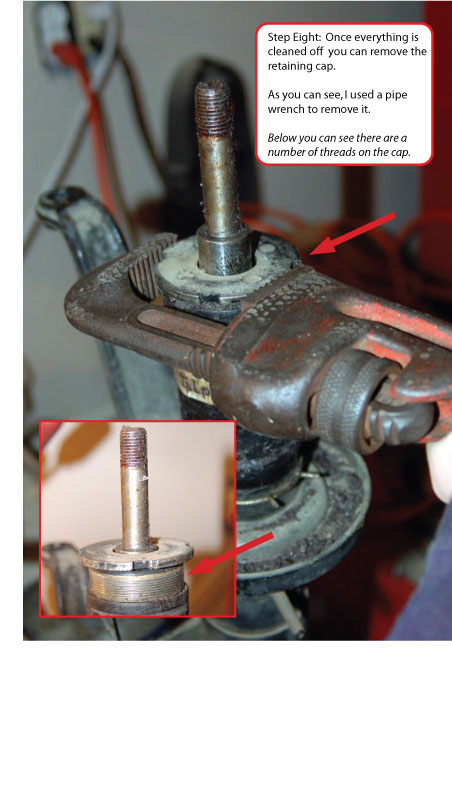
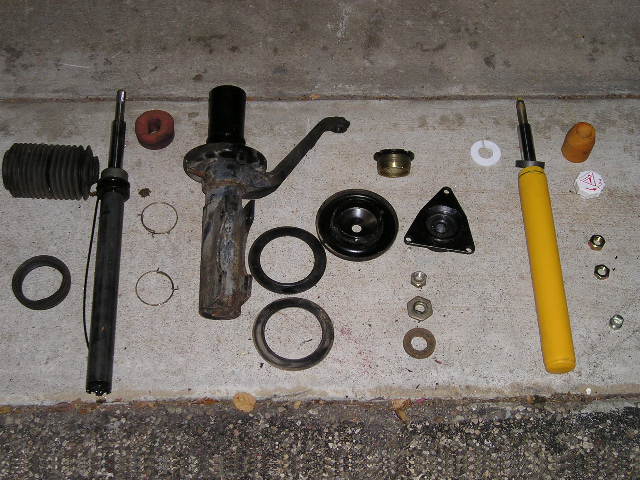
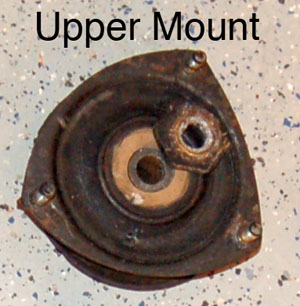
Step by Step procedure to remove the front struts, the insert can be replaced after milling the new ones slightly. Thanks to David Enger of Chicago. Also to be found on Lambo-Talk |

![]()
|
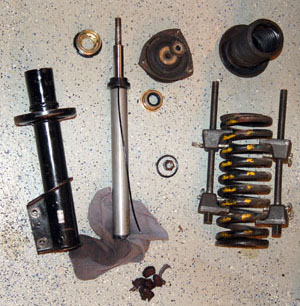
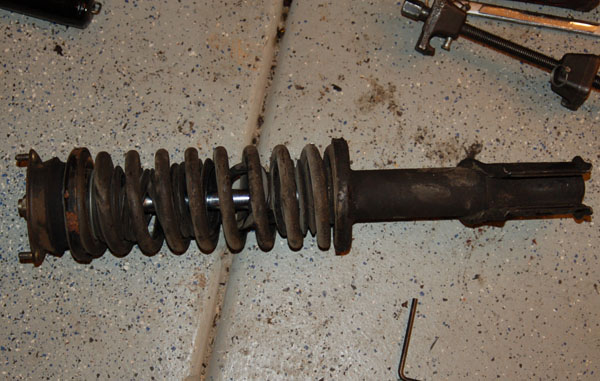
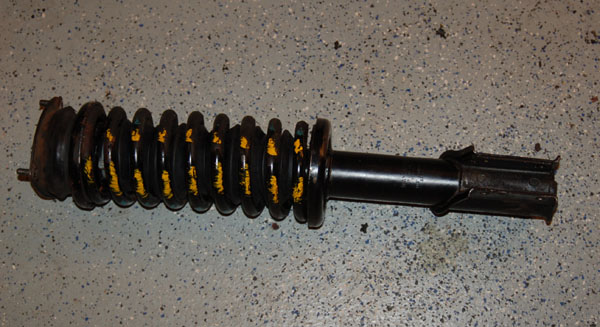
Another solution with Koni inserts 8610-1437 I just completed my front shock installation as the picture shows. As previously mentioned I wanted to install Koni’s 8610-1437 one-way adjustable shocks in the front and got them early this week. The removal of the struts were easier than I thought, especially since both tie-rod ends separated with little convincing. Once the struts were out
I was surprised to see that they actually worked, except for some internal
scraping and the rod was precessing 3 mm when rotated. They functioned
well enough to assess their characteristics, which as very soft in compression
and maybe twice as hard in rebound. The original shocks used the McPherson
tube as the outer fluid container while the Koni I a self-contained
insert. The bellows were dead and I was unable to find a good substitute (so thanks Mike for the reference for next time “I am in there”) and the bump stops were crushed due to my sagging springs. The fitment of the Konis
was close but not perfect. It needed a ½” spacer in the
bottom and some machining on the cast iron fitment ring (OD from 44.0
mm to 42.2 mm) and inside very lower section of the large compression
nut (from 42.4 mm to 44.0 mm). With that done the fitment was near perfect. Unfortunately I too late realized what the reasoning behind the recommended filling of the strut with oil was, so I installed the cartridge dry. As it turns out the oil acts as a thermal conductor, meaning that I probably should not take my Jalpa to the Baja rally, or participate in exhaustive track events until I get the struts filled (and a bellow installed). As can be seen in the “installed” picture I had also made some 1” spacers to compensate for the sagging springs. There is also a (two-half) ½“ spacer ready to be installed if needed. Underneath the dirt and undercoating the parts were almost as new (no rust) so I left it alone in spite of the questionable presentation. The whole process took two work-days and if no spacers would be needed the insert change can be done in 4 hours by a trained person. By the way www.paragon-products.com (Jason) has a few Koni sets left if anybody is interested. Thanks to Laust Pedersen Also to be found on Lambo-Talk
|
![]()
|
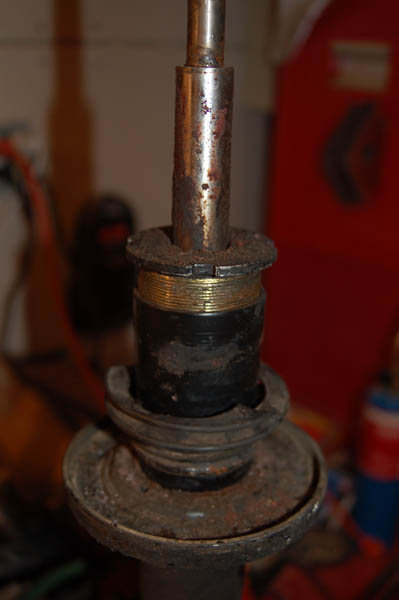
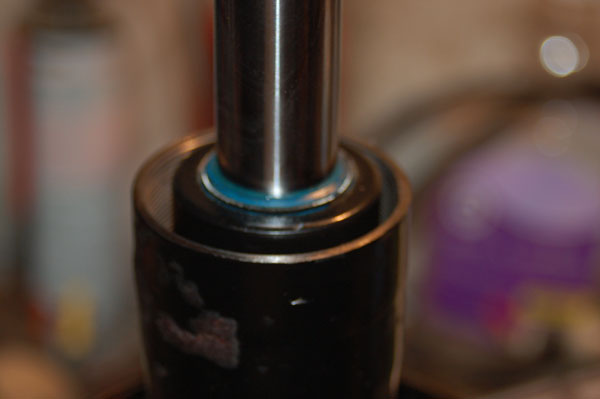
Rear Struts: Okay so I have the rear struts complete. I have not had a chance to road test because the weather is not great in Chicago. You can see from the images below just how bad they were. If you have a bit a mechanical knowledge and access to a drill press you can do them both for around $100. I ordered 2 Monroe SensaTrack
strut cartridges (#73264 @ $44 each) and two monroe Bellows and bumper
kits (#63619 @ $14 each) 1. remove the strut assembly (side note: I cut down the bumper to allow a bit more travel and allow more room to put the top spring mount and upper mount on) Thanks to David Enger of Chicago. Also to be found on Lambo-Talk |


![]()
© Copyright www.jalpa.ch
E-mail:info@jalpa.ch