Lamborghini Jalpa
common Problems
![]()
|
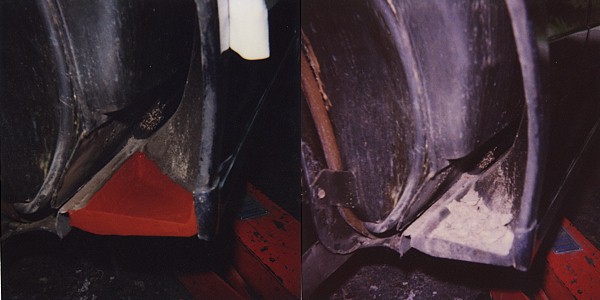
One common problem on italian cars is rust, on the Jalpa specially the fenders are the problem. The lower part of the fender has the form of a "U", water will rest there and after years with the addition of stone chips, the surface protection will become weak and it begins to rust. |
![]()
|
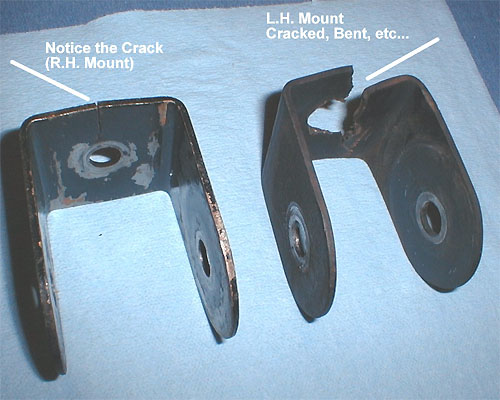
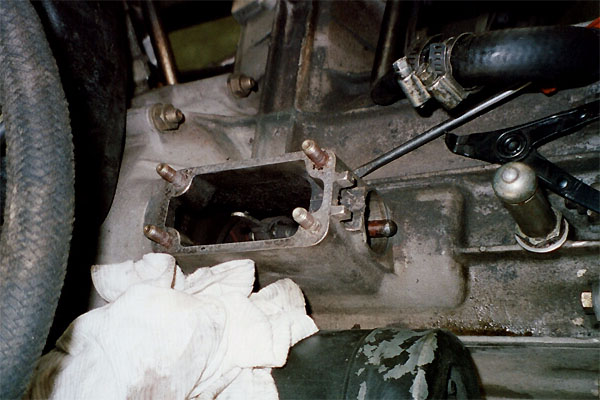
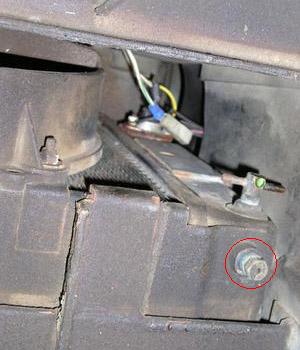
Another problem are the engine mount brackets, Lamborghini used a too weak steal and the washers are too small, this leads to metal fatigue. |
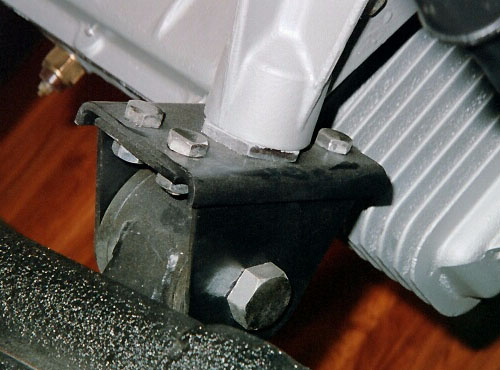
Left side behind driver

Main screw is not centered in this mount
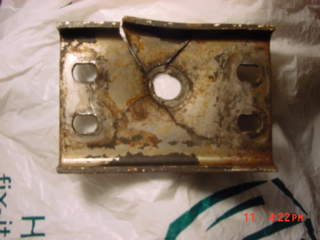
Too small washer causing cracks
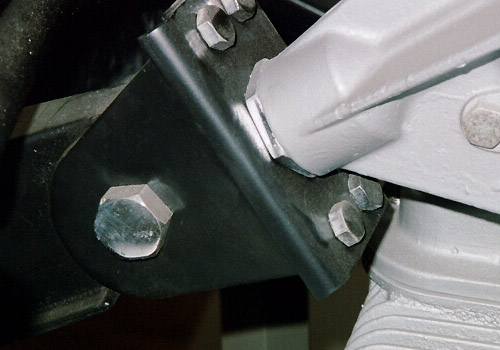
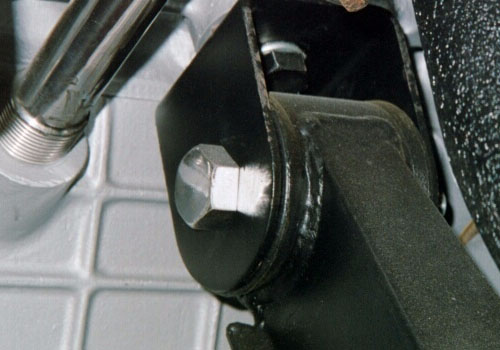
right side engine back towards trunk, same mount as on the right front
![]()
|
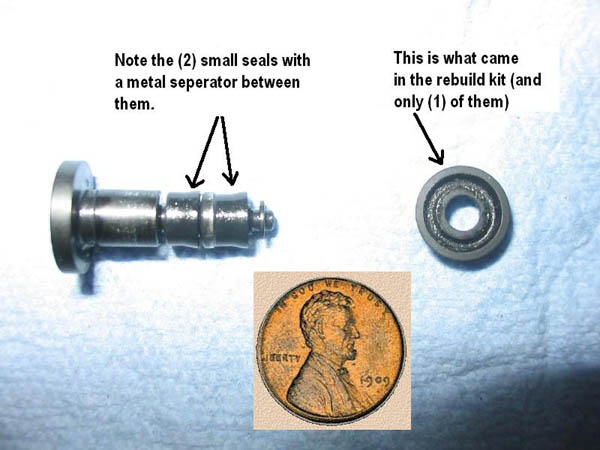
Also very common is blue smoke, the valve seals are wearing out, on acceleration the engine sucks the oil through the guide and will burn it. Very remarkable when the engine is at idle and suddenly throttle is pressed. There is no fix except reneweing valve guide and seals, sometimes sealing products are helping to suppress the blue smoke. All in all the Jalpa engine needs to run rich to run propperly in high rpms, this leads to a high CO-Level at idle. A lean running engine pops the whole time. |
![]()
|
Another Problem is brake overheating, Lamborghini did not install cooling ducts. Simple solution install your own: Brake Pads fitting: ATE calipers the fronts are (BMW type) D163 pads and the rears are
D96 pads. |
![]()
|
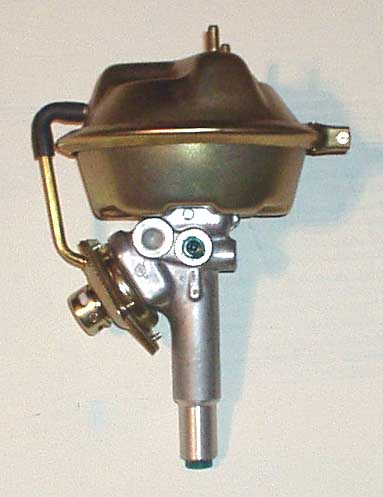
Brake booster The brake booster is a "Bendatalia", and looks very much like the same units used on the late-60's Alfa Romeo's. The brake booster are the same on early Jalpa, Urraco P300 and Silhouette. They are also fitted on Alfa Roméo Giulia 105 and early Lancia Scorpion (US) or Monte Carlo (Europe). I have rebuilt mine on the P300 with rebuilt kit from Alfastop: www.alfastop.co.uk Repair kit, Bonaldi 105.14.45.022.02/46 Air valve unit 105.14.45.022.22/47 You need one kit per side. For acces remove the complete headlamp and after it's easy.
|
![]()
|
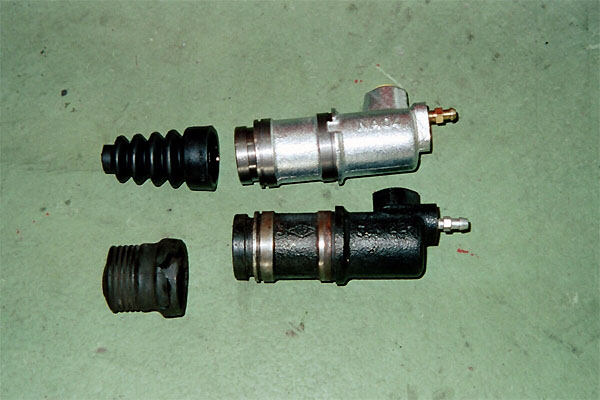
Not a problem but a guide to change the clutch slave cylinder, so you don't find the same trap as we did...
During the engine was removed, we thought it could be a good thing to replace the clutch cylinder, knowing Lamborghini often uses Alfa Parts I bought an Alfa clutch slave cylinder.
After we found that trap, I had the old cylinder overhouled and reinstalled the old cylinder with the engine in place:
|

![]()
|
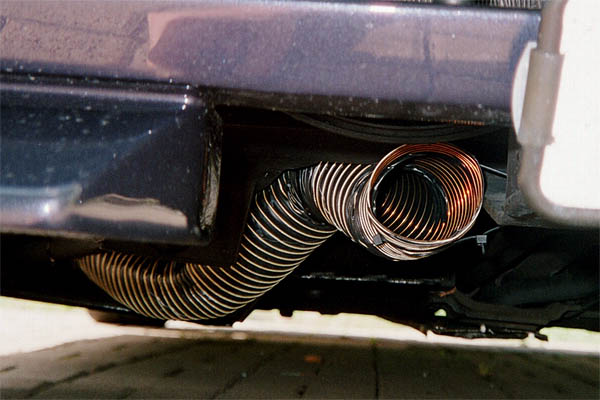
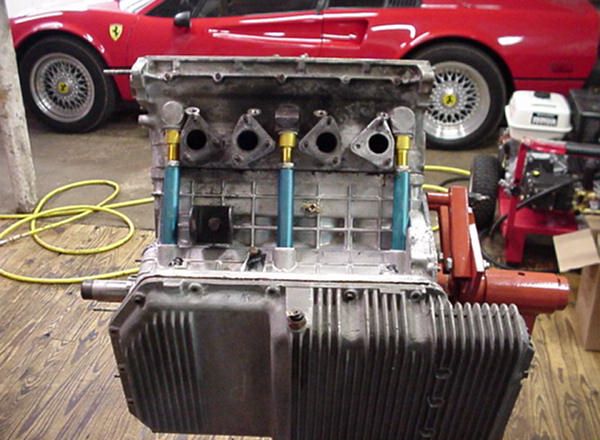
These oil return tubes are from a Volkswagon Beetle and can be serviced without removing the head.... If yours are leaking, Pry them out and replace them with these. Use Aircraft gasket maker on the threads. Also replace the coolant drains with standard chevrolet radiator drain petcock |
![]()
|
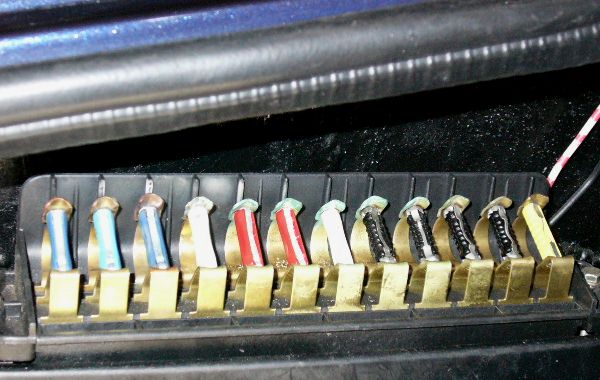
After winter my fuel pump decided to work only when she wanted to, I almost got mad about that behaviour. I first thought the fuel pump itself is the problem, but finally I found out it has to be an electrical issue. I wanted to check whether all relais were working correct and opened also the fusebox and there was my problem: simply the fuse holders were corroded, after cleaning them all works fine again...
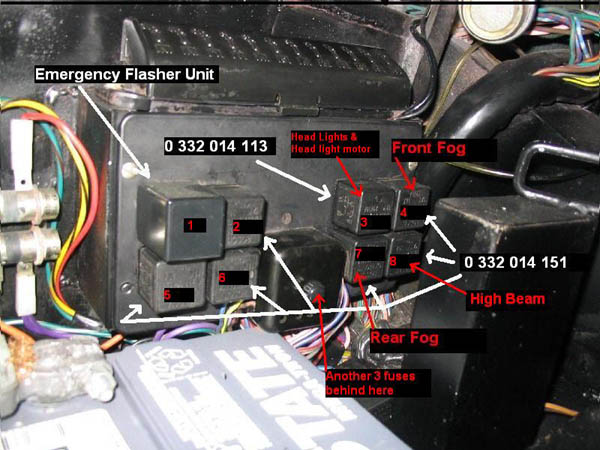
I think I have managed to attach the updated relay picture. I have
tried to highlight what I have managed to work out. I have numbered
the relays from 1-8 going right to left and top to bottom. From the
original diagram The emergency flasher unit in number 1. From my basic
understading of the relays there are two types of relays used(Excluding
the flasher unit) The first type is the one mentioned in the previous
post as having the 2 87 spades relay. This type of relay makes a connection
from spade 30 through to both the 87 spades when the coil is energised
ie when you have 12v across spades 85 & 86 (You should hear the
relay click when you do this) If you have 12V on the 30 spade you should
now have 12V on the two 87 spades(commonly called make contact relay
usually has 12v30A on it somewhere). This is the most common one on
the jalpa and you should have this type for relays 2,4,5,6,7 and 8 from
the diagram I have attached. |
![]()
|
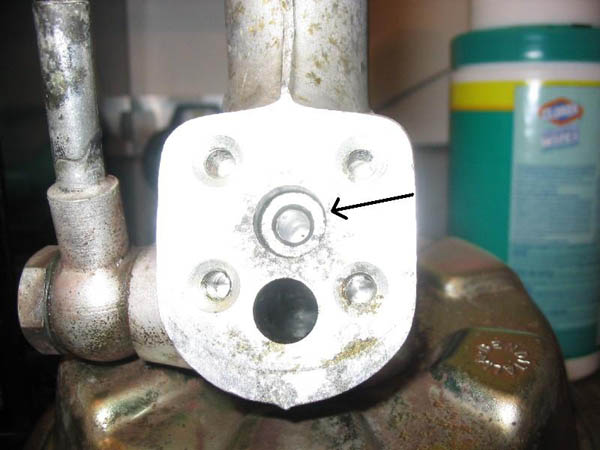
Bleeding the cooling system of the Jalpa is something not easy if you don't know how. In the owners manual is no indication how to bleed the system efficiently, we found on the radiator itself 2 screws, one is to drain the coolant, the second one on the bottom is a bleed screw, inside is a pipe which goes up to the top of the radiator. By opening this screw you can bleed efficiently in case your radiator has this second screw...
|
![]()
|
Suspension parts: front wheel bearings are SKF 615645A also used on Fiat Dino Limousine rear axle.
FRONT TIE RODS ARE FRAP 511 |

![]()
|
Reverse light and Fog light for the rear Jalpa bumper came from the Citroên Visa and made by SEIMA. |
![]()
|
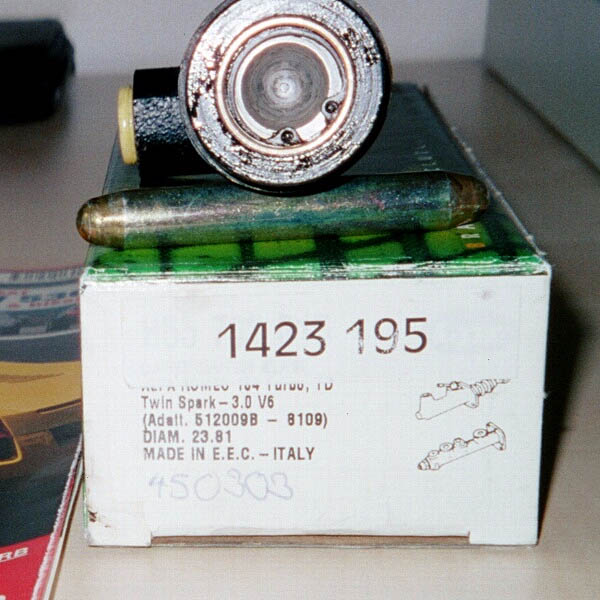
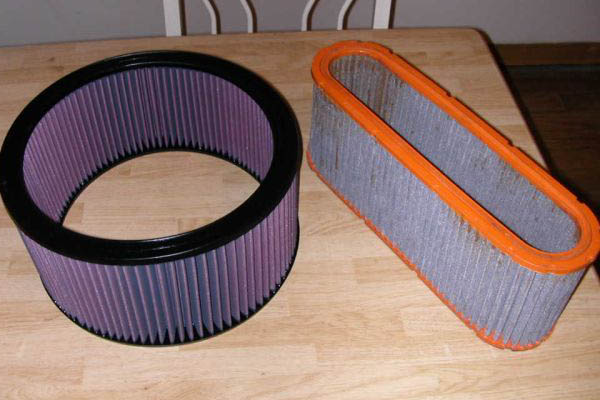
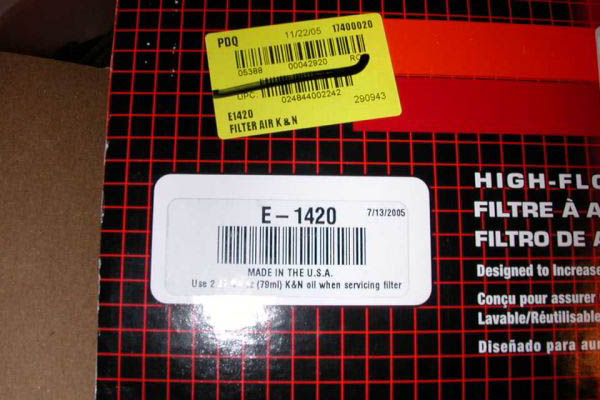
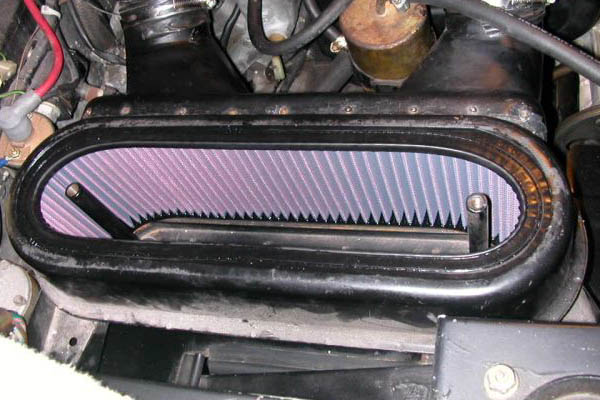
K&N replacement for the UFI-Air filter Torino A-204:
|
![]()
© Copyright www.jalpa.ch
E-mail:info@jalpa.ch